Although one of the key elements of Photography is the availability of Light, nothing can stop a Photographer from taking some crisp Night/Low-Light photographs. Low-Light Photography doesn't mean taking a black and blank photograph; it means utilizing the available light to take a shot or making the focus on a specific subject - Moon, Stars, or to play with Lights!
Now, how to take such crisp and vibrant shots in such Low Light conditions? Here's the solution:
1. Keep a Slow-Shutter Speed: Doing so would give the camera sensor more time to capture more of the available light and make the shot better. It not only reduces gains but also makes the picture better and brighter. But for slow shutter speed, there is a high chance of the photo coming out as blurred due to the camera shake, so it's advisable to use a Tripod.
2. ISO: There's no specific value for the ISO to keep while clicking Night Photographs. It totally depends on the environment and the subject you're capturing. For example, if you're capturing landscapes, a bit high ISO is required to capture the landscape in its glory (grains will occur) while if you're capturing the Moon or a specific Star, a low ISO suits these kinds of subjects.
3. Aperture: The aperture or f-stops should be kept in between f8 to f16 because you want to camera to be taking in as much light as possible and not searching for light and instead of bringing in grains. Also keeping such an Aperture will give you the Depth of Field.
 |
| (Image Courtesy - Dibyabrata Bhattacharya) |
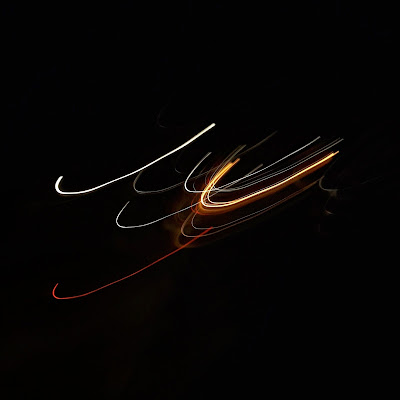
4. Long Exposure/ Light Trails: An awesome Photography Style is Light Trails- Making a trail of the lights. For such a shot, you need a very low ISO (50/100/200) and Long Shutter Speed (4s/8s/10s). Mount your camera/mobile on a Tripod or keep it in such an alignment that it doesn't move. Capture moving lights or you can take it the other way round - Shake the camera in a specific direction or in a specific shape (Round/Star/Heart) keeping in focus the light and you can end up having some jaw-dropping Light Trail pictures.
 |
| (This picture has been edited using Google Snapseed) |
5. Using Flash: Making your flash concentrated onto a specific subject while it's totally dark can give you some Professional-like shots where the background is totally blackout yet the foreground is perfectly exposed and is vibrant. Remember not to go too close to the subject else the Flash will make the foreground over-exposed.
6. Getting Creative: Always remember that Photography is all about making your imagination come to life and it's a DIY Project. Now, everyone might not have a high-end camera to capture the night sky, the stars: so why not make the Night Sky and Stars instead of mourning? Don't believe me? Okay, here's the recipe :
- Take a bucket/bowl full of water
- Mix any detergent/washing powder
- Make a thick foam
- Use the camera flash to only focus on the reflections created by bubbles in the foam.
- Do a bit of editing
and here,s your special recipe of Night Sky filled with Stars:-
 |
| (Just don't overdo it else people will think you're from NASA 👀) |
> I hope that you would have benefited from this blog and you're ready to shoot photographs that would make people go "WOW!"
> Follow me up on Instagram - https://www.instagram.com/mobigrapher_arka/
> No images should be used with the prior consent of the publisher.


op piro ggwp
ReplyDeleteThanks gg!
Deleteoutstanding op op op op op op op op op op op op opo oppp
ReplyDeleteThanks a lot!
DeleteAwesome
ReplyDeleteThankq
Delete